I101: Introduction to Informatics
Lab 5 - Introduction to Operating Systems: Unix
1. Introduction To Operating Systems
First, view the following powerpoint presentation to understand what is an operating system, and looking at features of some of the most common systems in use these days.
Operating Systems Presentation (pdf version)
Unix is command driven--that is, you have to give commands to make it work. This lab will examine the following commands:
| COMMAND | FUNCTION | |
| chsh | change the shell | |
| whoami | gives the current user name | |
| finger | gives information about someone on the computer | |
| ls | lists the directories and files in a directory | |
| who | lists who's on the system | |
| more | scrolls though a file | |
| rm | removes a file | |
| cd | moves to another directory | |
| cal | gives a calendar | |
| mkdir | makes a directory | |
| rmdir | removes a directory | |
| clear | clears the screen | |
| echo | puts something to the CRT (monitor) | |
| date | gives the date and time | |
| exit | logs out of the remote system |
The tree-structure of Unix is composed of directories and files. A directory is a location. A directory can contain other directories or files. A file is simply data. A directory has a path name--which works much like your address. When you send a letter you usually give your name, address and zip, state, and country. If you'd write it as a directory it'd look like this:
USA/Indiana/47408/901_E_10_St/School_of_Informatics
Notice a couple of things. First, as you read from left to right, you get more specific. For example, there are obviously many other states in the US other than Indiana--but this choice makes the path more specific. Second, there are forward slashes / between the different elements of information. Unix uses / to separate information, much like we use spaces. Third, notice there aren't any spaces! Underscore _ is used in place of space. So names can't have spaces.
Steel is a cluster of nine computers--Sun UE2e V100 computer nodes running a kind of Unix called Solaris 2.8. Each machine has a 500 MHz UltraSPARC2 processor and 1GB memory. If you have an account you may access it via a secure ftp (file transfer program) or ssh (secure shell) utility at steel.ucs.indiana.edu. You need to have an account on Steel, if you don't have one yet, please follow the instructions to get an account at Steel before proceeding.
All IU students, staff, and faculty may have accounts on Steel.
To create one, visit the Account Management Service at:
https://itaccounts.iu.edu/
After you log in (using your Network ID username and passphrase), click create more accounts. Follow the instructions to create your Steel account. It may take up to six hours for your request to be processed.
Steel's primary purpose is to provide an interactive environment for general-purpose Unix computing. It is also the location for hosting and editing personal web pages. You can find more information about what software is available on Steel at:
https://www.indiana.edu/~rats/research/steel/software.shtml
2. Logging on to Steel for the First Time
If you've never logged on to Steel, follow the directions here. If you already have, jump to here.
1. Open Secure Shell Client by going to
Start>>Programs>>Utilities >> Secure
Shell
On some lab machines SSH Client might be in a different
place, so check with your lab instructor if you have any problems finding it.
You should see something like this:
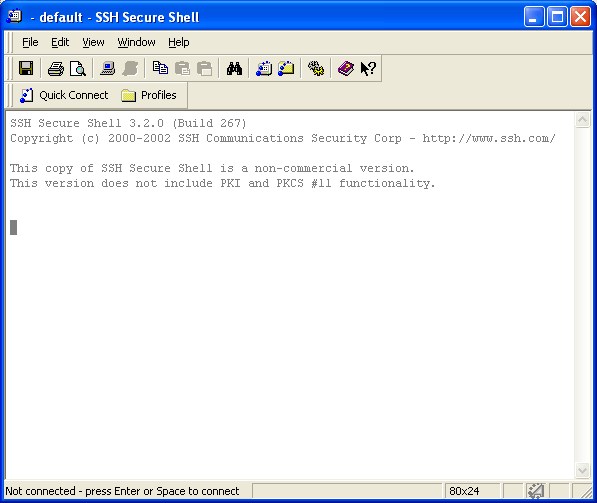
Secure Shell is a service that allows you to use another computer remotely--somewhere else. In this case, you're using your account on one of the nodes of the Steel cluster.
2. Hit the <SPACE> bar to bring up a connection window. Enter steel.ucs.indiana.edu in the box for hostname and put your username in the User Name box. Leave the other 2 boxes alone.
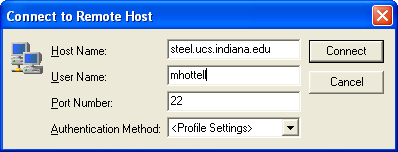
Press the connect button, and enter your password in the resulting dialog box:
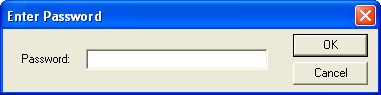
Once you've done that, you'll be presented with a screen similar to this:

This is a message screen for you to read . It tells you important and timely information about the account, etc. If you look, it also as some important information about phone numbers and URLs to help you.
You can also tell which one of the nine nodes of Steel you are using - it is the number after "steel" in your prompt on the bottom left of the screen. In this case, I am on node number 9.
3. Introduction to Unix
When you use Unix, you use a shell . A shell is like an intermediary between you and the computer--much like Windows 2000--where you use a graphical interface as an intermediary between you and the computer. The shell does all the hard work for you. You just have to tell it what to do.
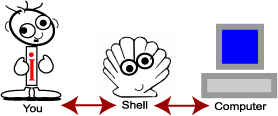
The shell is an intermediary.
There are a number of different shells.
| Different Shells and Their Locations | |
| /bin/sh /bin/csh /bin/ksh /usr/local/bin/tcsh /usr/local/bin/bash |
For this class, we will use the fifth, /usr/local/bin/bash. At the end of the semester you may want to change shells. Different people prefer different shells, but for now, we'll use the same shell to make learning easier.
1. Use SSH to connect to Steel. For this class, we all want to use the same shell--to make work easier. First, we have to find what shell you have. The prompt is where you type commands--it's where the cursor is. At the prompt type
echo $SHELL
You should see something like this:
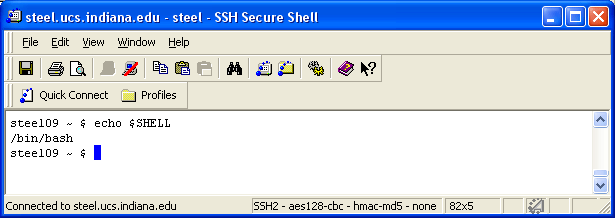
You can see from above that my shell is bash. This is the shell we want. If you see something else, you need to change the shell. How do you do that? There's a simple command chsh.
2. To see how to change your shell type
chsh
You should see something like this:
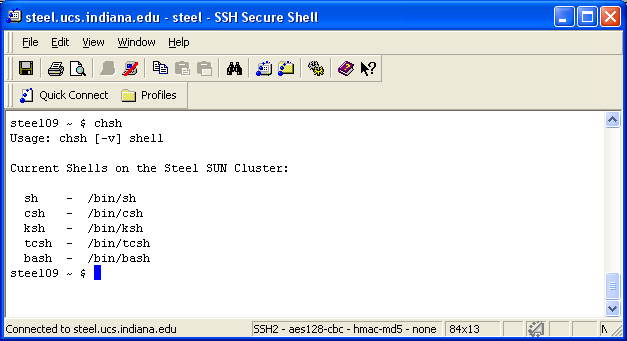
The "Usage:" is explaining how to use the change shell command. The [-v] is an optional "switch". A switch is additional information you give a command. Anything in brackets is optional. For now, we'll ignore this switch. If you have another shell, you need to change it to tcsh.
3. Everyone should do this--even if you have bash. At the prompt enter
chsh /bin/bash
You should see something like this:
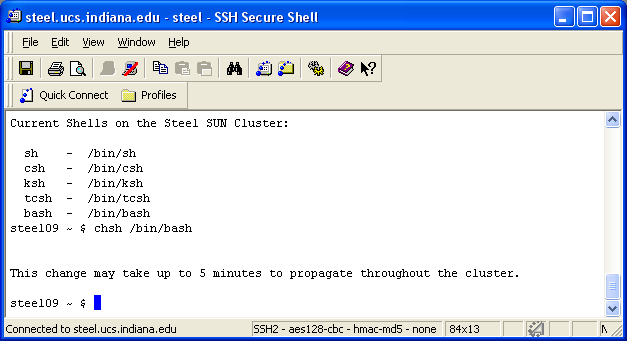
Before we go on and learn more commands there is a help command that you can refer to when you're curious about any unix command. It is called man and is short for manual. It shows you the reference manual of all the unix commands.
4. Let's check the man page for chsh. At the prompt enter
man chsh
5. You can even look up the command man itself. At the prompt enter
man man
It's sometimes nice to clear the screen. The clear command clears the screen.
6. Clear the screen now. At the prompt enter
clear
Your screen should clear.
Your account actually knows who you are. There's a command that tells you.
7. At the prompt enter
whoami
You should see your username like this:

To find out details about someone, you "finger" him/her. This command looks for information in a particular file and displays it. You can modify this file and put important information you want people to know about you, your semester, your job, etc. We'll do that in a later lab. To finger someone, you enter the command finger followed by their network ID or last name. If there multiple people with the same last name, you'll get a lot of information back. If I finger myself, I'll see the following:
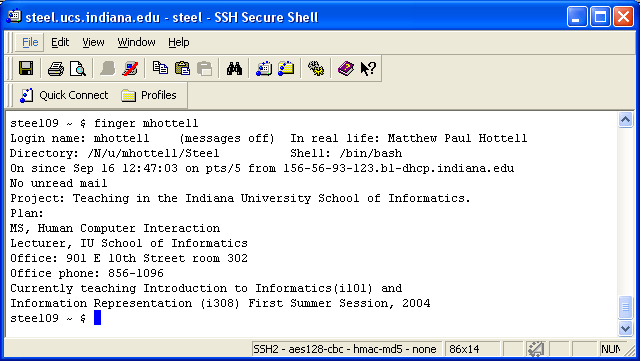
You can see that the finger lists, at a bare minimum, you name, your shell, how you're logged in, and whether you've read mail. Soon you'll be able to change the file that contains information about that is displayed by finger. I've just update my information and added the fact that Informatics is great. So, when I use the finger command on myself now, I'll see
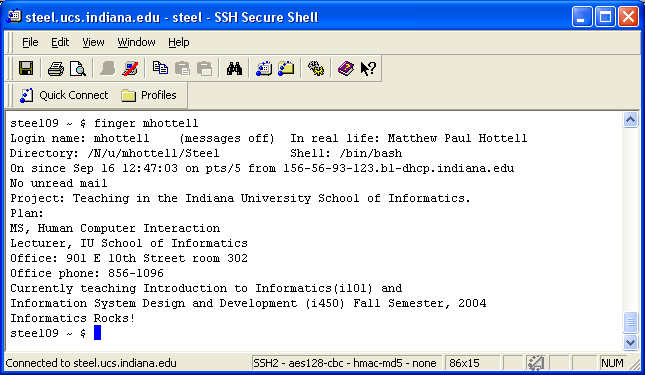
See the last line!
8. Ask the person next to you his or her network ID. At the prompt enter
finger "that person's network id"
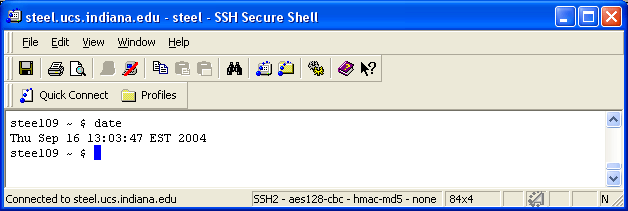
Some times, you'd like to know the date and time. UNIX provides a convenient way to find both of these. The date command give the date and time.
9. At the prompt enter
date
You should see something like this:
You can also use the calendar command cal. The usage is: cal [ [month] year ]. The month must be a number: 1 for January, 2 for February and so on. The calendar command displays a small, nicely formatted calendar. From the usage, observe you can find the calendar for any year and any month and year.
10. At the prompt, find what day your birthday will on in the year 2010. Since I was born in June 3rd, this is what I did:
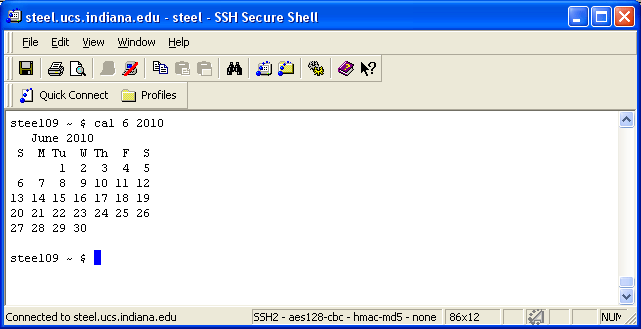
So my birthday will fall on a Thursday.
11. Remember, the directory structure is like a tree. The very top of the tree is the root. Your account is an internal node or leaf depending on whether you have any thing in your directory. Depending on who you are, you have more a less authority to create and edit directories and files. Just for fun, let's go to the root of Steel. Enter (a space between cd and forward slash):
cd /
To see what's located in the root directory, we use the ls command. The ls command lists everything in a directory.
12. To see everything at the root, enter
ls
You should see something like this:
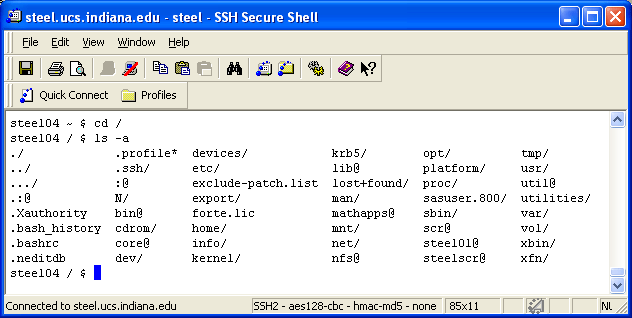
The words with a / at the end are directories. Don't worry about the other strange symbols right now. The best place to be, however, is in your own directory. It'd take a bit of time to navigate down through the right path to find your directory, so UNIX provides a straight shot.
13. To go back to your home directory enter cd or cd ~. Go back to your directory now. When you get back, do an ls to see what's there. Here's how I did it.
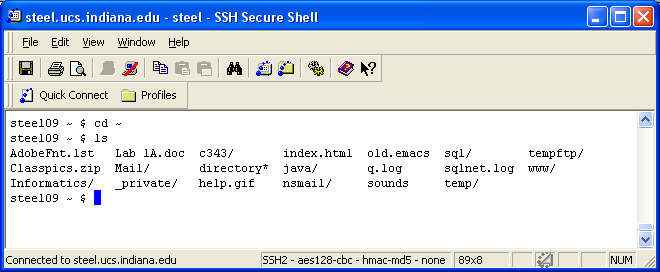
To see more details about what's there, you can type ls -a to see all the files that begin with a period or 'dot'. This is why they are called "dot files." Dot files generally contain operational information for your account and so you normally don't care about them--that's why ls doesn't show them to you unless you specifically command it to. ls -l gives the permissions of your files. One of the most important aspects of UNIX to understand is permissions. We'll look at permissions in much more depth next lab. For now, we'll simply examine the permissions.
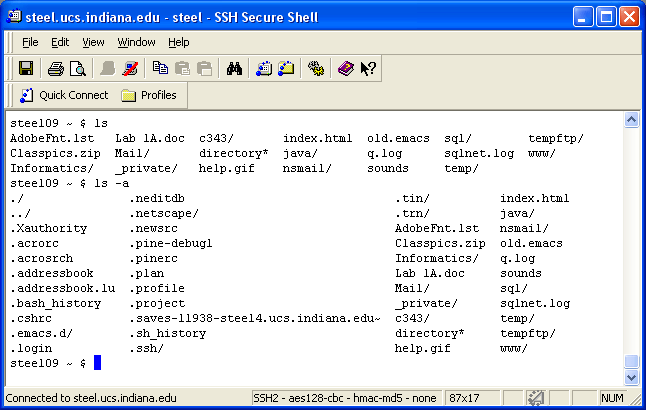
14. Use the ls command, first by itself, then with the -a switch, then with the -l switch, then both.
Observe my output for the above for ls and ls -a
And for the command ls -la
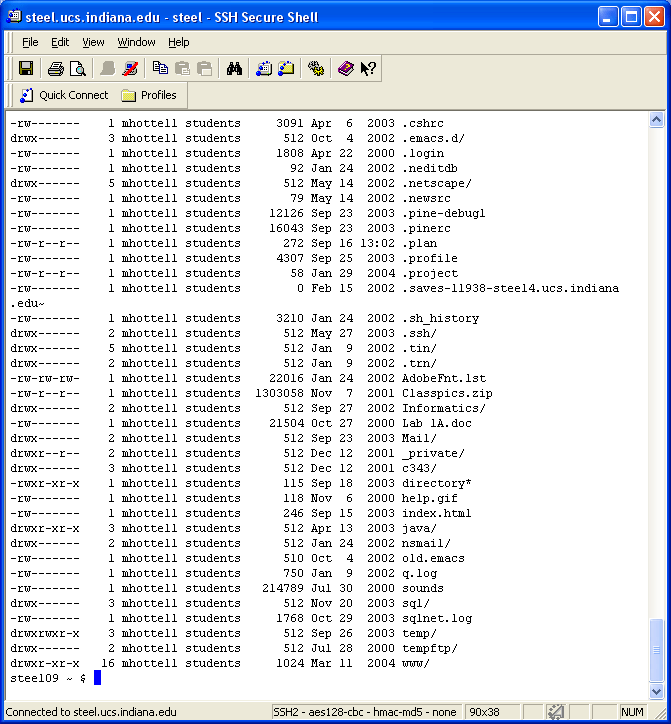
The last command ls -la gives, among other things, whether the something is a file or directory (the d or dash) and permissions. The file or directory name is at the right most. For example, the first file ./ is your current directory. The drwx-----x indicates who can read, write, or execute files, directories, and programs. The ../ is the parent directory--it's the directory that contains your directory. There's also information about when the file or directory was last modified. Again, we'll look at this in more detail next week.
UNIX provides a way for you to find where you are using the pwd command.
15. Use the pwd command to find the path of your working directory. Then goto the root. Now, using the path to your working directory, cd directly to you home directory using the path from pwd at the first step. Here's what I did:
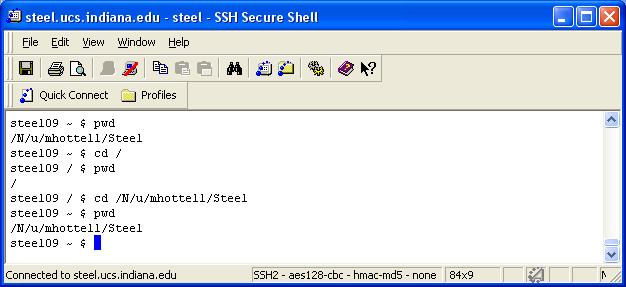
Observe the above closely. I first issued the pwd command and found the "absolute" path from the root to me. This is how I must move starting at the root to where I am currently (see the figure below). Next, I went directly to the root--you've seen that command earlier. I then did pwd again. Because I'm at the root, it returned the root. Next I used cd and gave where my directory was cd /N/u/mhottell/Steel and went directly to my home directory. I issued pwd again and again it returned the path
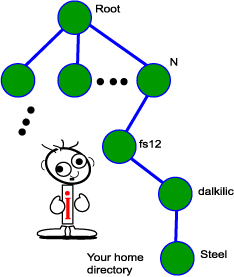
The path between you and root. Each node is a directory in the path.
To move up and down through the tree, you use cd. To move one directory up, you enter
cd ..
The two dots represent the directory one level up. To use this command, let's first create a directory.
16. To create a directory, you use the mkdir command. Make sure your in your home directory first. Do you remember how? Then at the prompt enter
mkdir Informatics
Next, do ls. You should see the following:
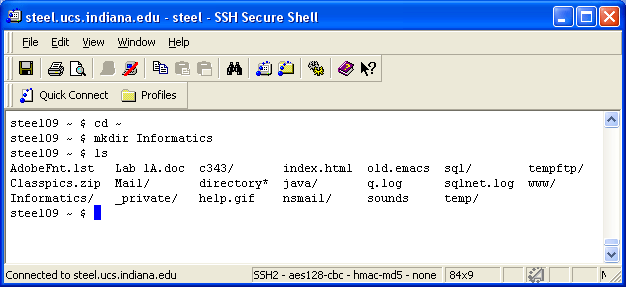
The first command makes sure I'm in my home directory. The second creates a directory called Informatics. I use the ls command to make sure it's there. What if you've misspelled Informatics? You can remove an empty directory by using rmdir.
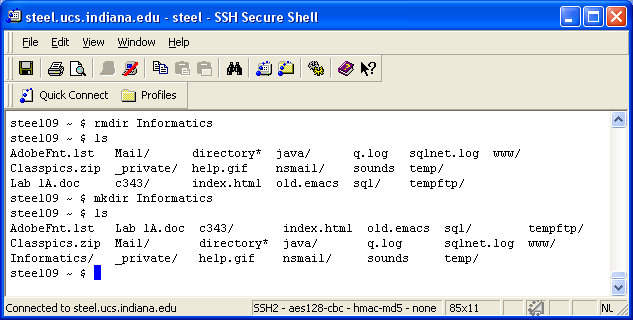
17. Remove the directory, and confirm it's gone using ls. Recreate the identical directory. How can you tell it's there? This is how I did it.
We can check the contents of a directory by using ls --we know that already. But we don't have to be in the directory to do so. We can give the path.
18. Check the contents of the Informatics directory while in your home directory. Make sure you're in your home directory, then enter
ls Informatics
You should see this
steel ~> cd ~
steel ~> ls Informatics
steel ~>
19. Check the contents of the Informatics directory while in your home directory, but use ls -la.
You should see this
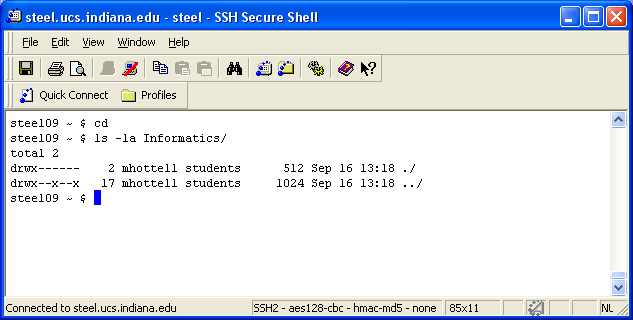
Information is displayed about the current Informatics directory (the first line) and then the directory above.
20. Move to the Informatics directory. Try to figure this out on your own before you see how I did it.
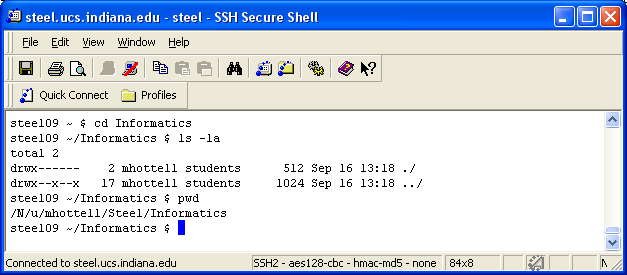
As you can see, to move to the directory you use cd directory-name. I did an ls -la and also a pwd. Notice the pwd gives the path to my home directory plus the new Informatics directory where I now reside.
The last couple of tasks will be to create a text file, rename the text file, and then remove it. For this first lab, we'll use a clever trick to create a text file. UNIX allows you to "redirect" the output of commands. For example, if you enter the command cal 2004, you'll get more than a screen full of information. You can redirect this into a text file.
21. At the prompt, enter
cal 2004
There was too much, too fast. Let's put it into a file.
22. At the prompt enter
cal 2004> kan
You should have seen this:

Where did the calendar go? It went into a file that you just created and named kan. The output of the calendar was redirected to kan.
23. Verify there's a file in your directory. Try to figure this out before you look at what I did.
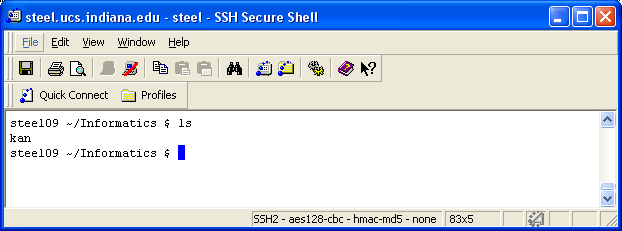
kan is the single file contained in the directory. To view its contents, we can use the command more (yes, there's a less command too, but we'll look at it later).
24. Enter the command
more kan
You'll see a percentage at the bottom--that's how much file has been viewed. Just hit the space bar to keep scrolling. This is a one pass process (less does more than more [you should be starting to feel kind of geeky and knowledgeable right now]).

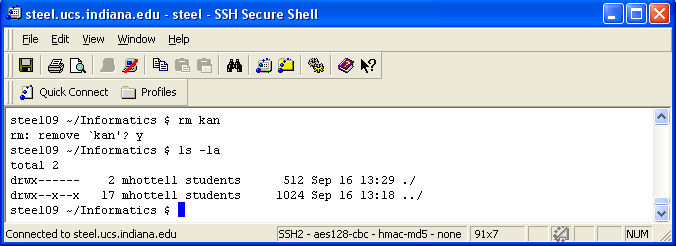
To delete a file you must remove it. Let's remove kan.
25. Enter the command
rm kan
You'll be asked (some of you) if you want to remove kan. This is just a precaution so as not to remove valuable files. Just press 'y'. Now do an ls -la. kan should be gone.
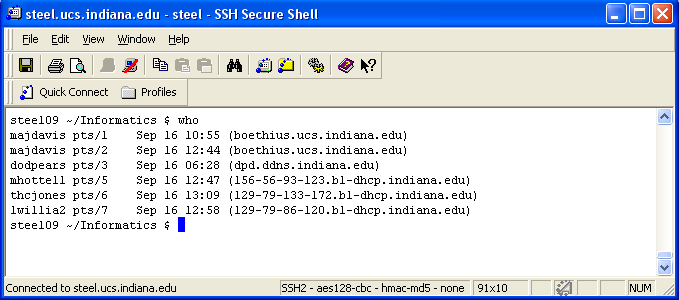
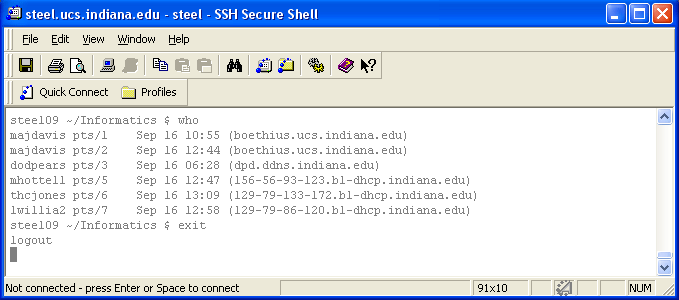
26. You can check who's on the same node of steel as you by issuing the who command. Give the who command and see if you can find someone sitting next to you. This is who I found:
To log out of our remote session on Steel, simply type the command exit. The text on your terminal screen will turn gray and your session will end.
4. Blog Comments
Comment on the blog at least 4 important Unix commands which you have learned today. See if you can also find their Windows/DOS counterparts. Also, comment on Chapter 6 from Andy Clark's book. These are the deliverables of this lab.
When you've reached this point, you're done with this lab.
More Advanced Users
Those of you who've had more experience with UNIX should try to accomplish these as well.
1. Change your finger. You must edit the .plan file. I use pico or emacs to edit my files. Goto your home directory by entering the command cd. Create a file called .plan. The file should contain relevant information about you, your schedule (Something about I101), your skills, etc. When you're done, save the file and exit. You now must make the .plan accessible. Enter chmod o+rx .plan and chmod o+x .plan . The first command makes the file accessible. The second lets people do the finger.
2. Create a .project. Follow the same procedure above. When someone fingers your account, your .project file should be displayed on a single line above your .plan information.

